距离上一次搭建Hexo/NexT博客网站已过去四年。虽然整体交互体验并未发生颠覆性的变化,但在交互细节与部署实现方面,确实持续进行了打磨与优化。这一次我打算使用最新版本(hexo 8.1.1 / NexT 8.26.0)重新构建我的博客网站,同时会结合更多的工具(Docker、Github Action/Pages、Gitea Actions/Nginx)来优化整个部署PIPELINE。
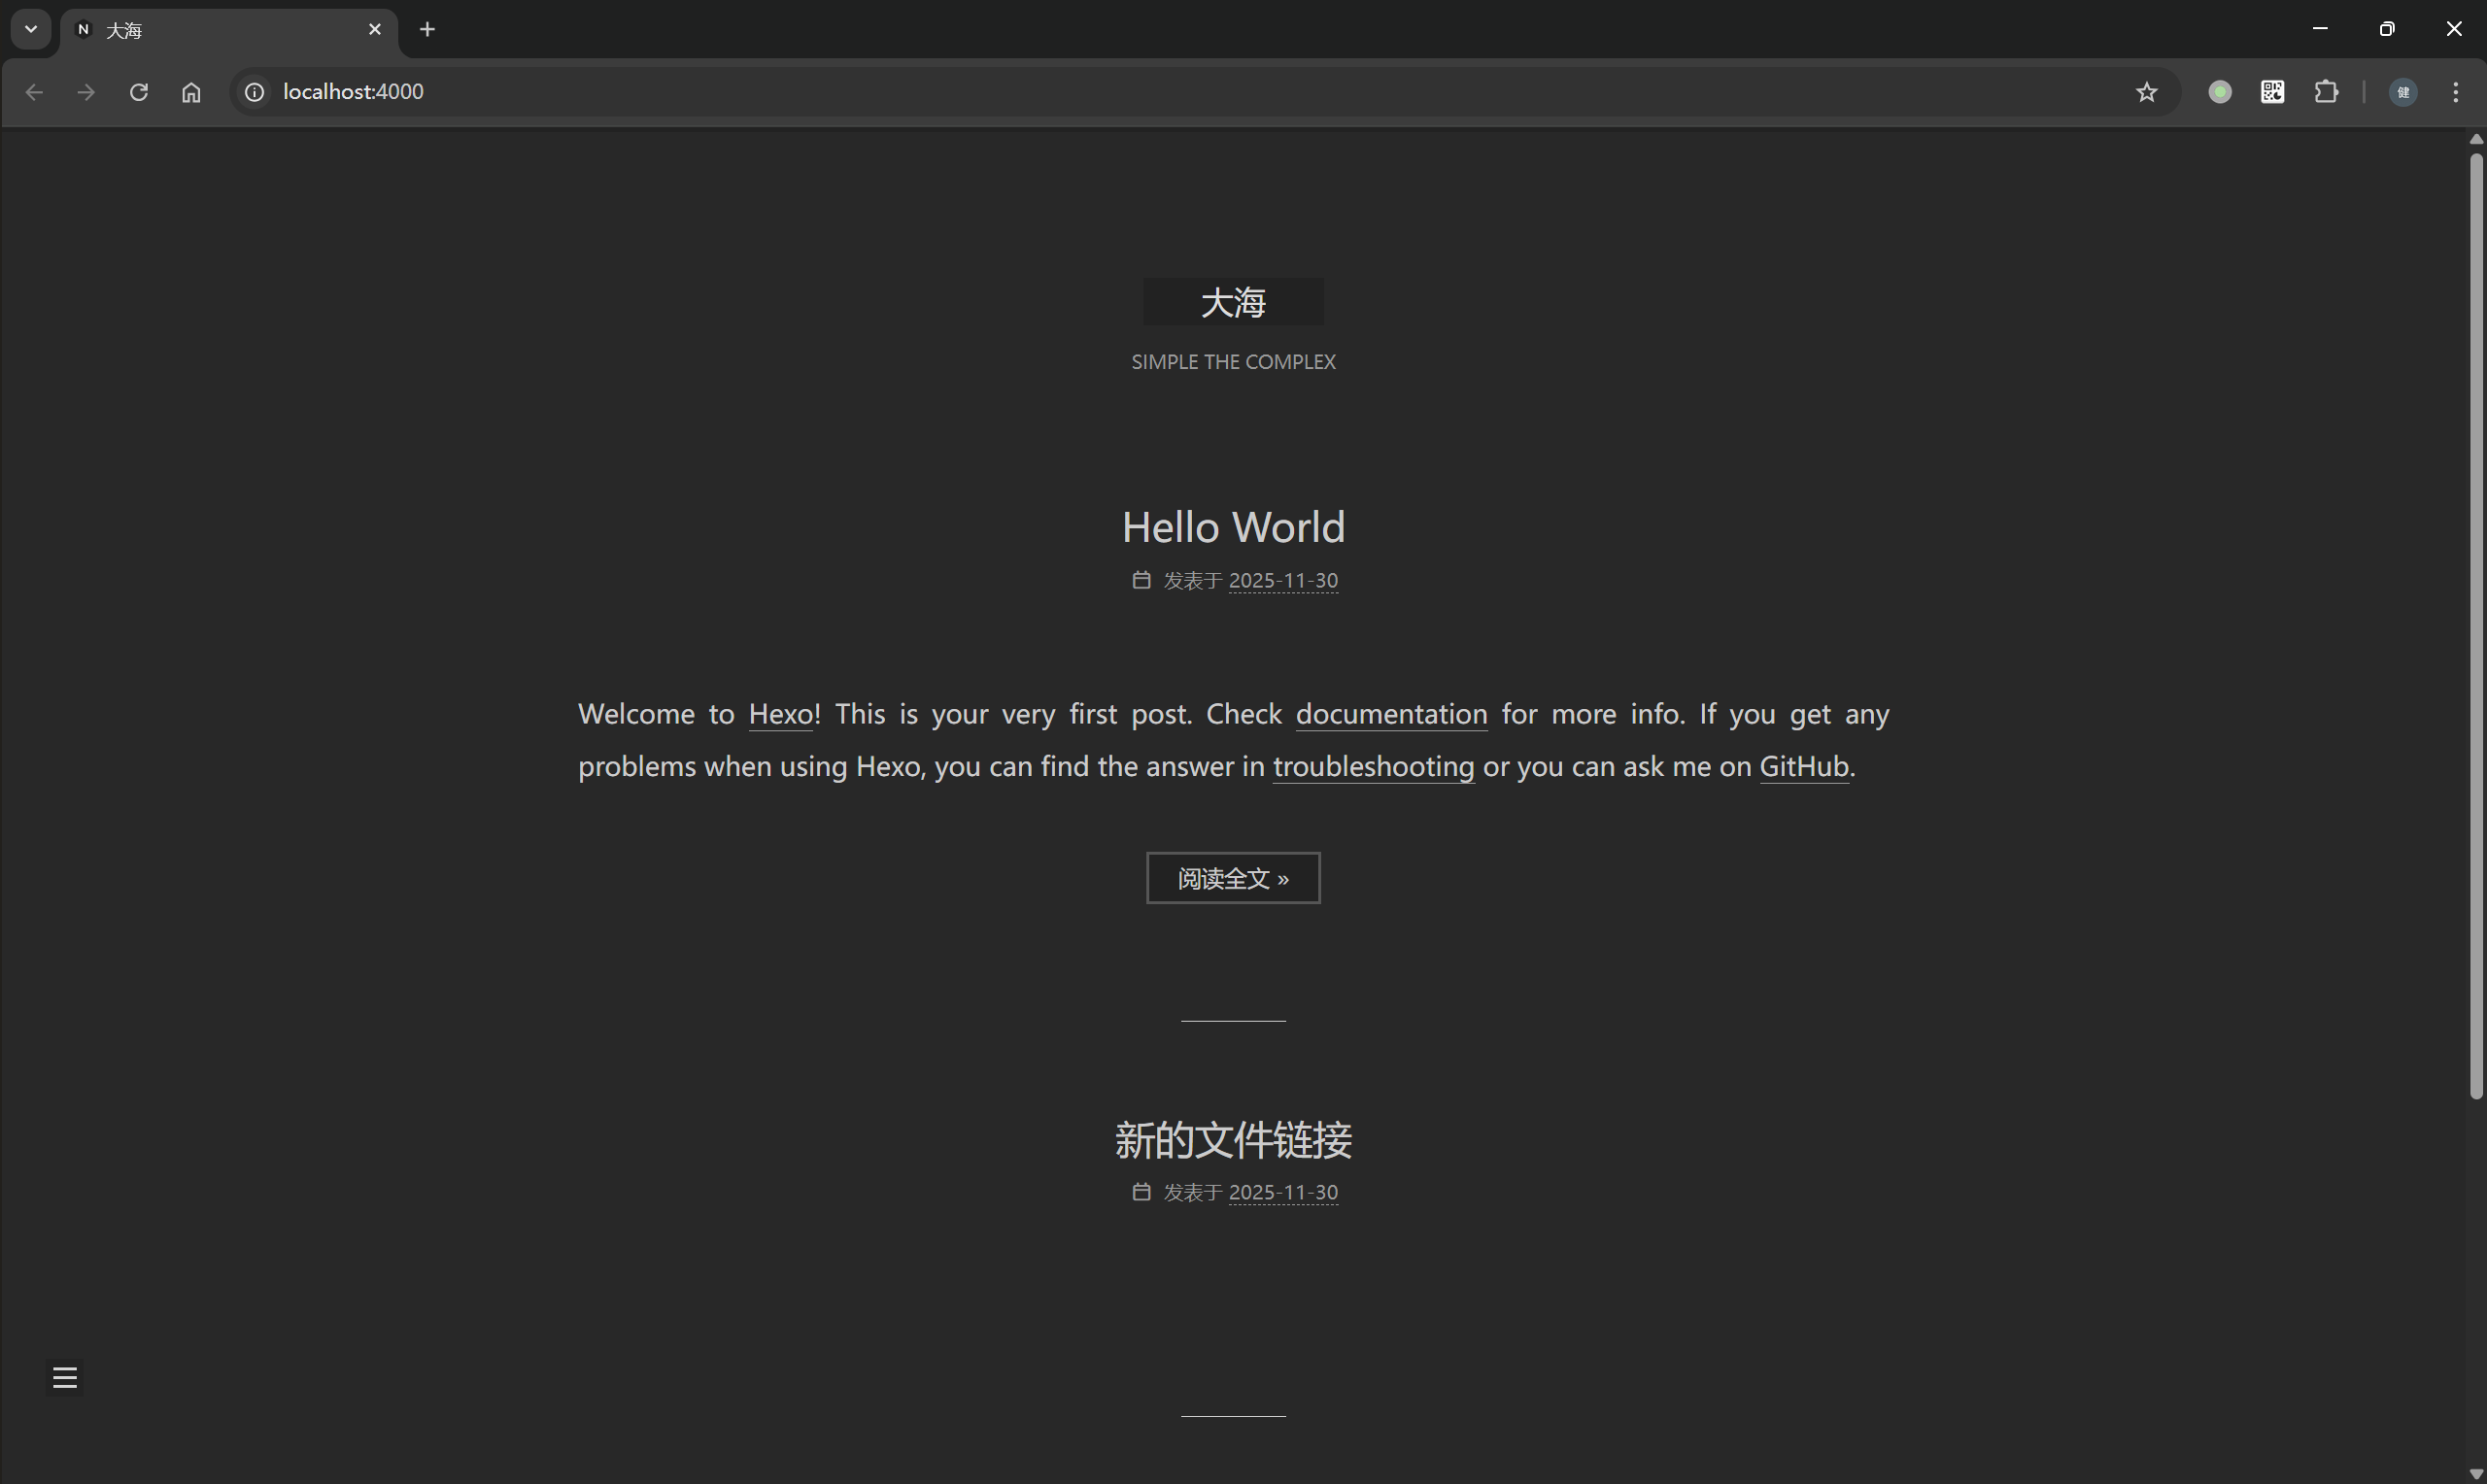
集成NexT主题 1 2 3 4 5 6 7 8 9 10 11 12 13 14 15 16 17 18 19 20 21 22 23 24 25 26 27 28 29 30 31 32 33 34 35 36 37 38 39 40 41 42 43 44 45 46 47 48 49 50 51 52 53 54 55 56 57 58 59 60 61 62 63 64 65 66 67 68 69 70 71 72 73 74 75 76 77 78 79 80 81 82 83 84 85 86 87 88 89 90 91 92 93 94 95 96 97 98 99 100 101 # 安装 NexT 主题 git clone --branch v8.26.0 https://github.com/next-theme/hexo-theme-next themes/next # 修改 _config.yml,设置 theme: next # Extensions ## Plugins: https://hexo.io/plugins/ ## Themes: https://hexo.io/themes/ #theme: landscape theme: next # 重新生成静态网站 node@7a8222b21ebc:/blog$ npm run dev > hexo-site@0.0.0 dev > hexo clean && hexo generate && hexo server INFO Validating config INFO Deleted database. INFO Deleted public folder. INFO Validating config INFO ================================== ███╗ ██╗███████╗██╗ ██╗████████╗ ████╗ ██║██╔════╝╚██╗██╔╝╚══██╔══╝ ██╔██╗ ██║█████╗ ╚███╔╝ ██║ ██║╚██╗██║██╔══╝ ██╔██╗ ██║ ██║ ╚████║███████╗██╔╝ ██╗ ██║ ╚═╝ ╚═══╝╚══════╝╚═╝ ╚═╝ ╚═╝ ======================================== NexT version 8.26.0 Documentation: https://theme-next.js.org ======================================== INFO Start processing INFO Files loaded in 220 ms INFO Generated: posts/4a17b156.html INFO Generated: archives/index.html INFO Generated: posts/8ef5633d.html INFO Generated: posts/180d6a30.html INFO Generated: images/apple-touch-icon-next.png INFO Generated: index.html INFO Generated: tags/new/index.html INFO Generated: images/avatar.gif INFO Generated: images/favicon-16x16-next.png INFO Generated: images/logo-algolia-nebula-blue-full.svg INFO Generated: images/logo.svg INFO Generated: archives/2025/11/index.html INFO Generated: images/favicon-32x32-next.png INFO Generated: js/third-party/addtoany.js INFO Generated: js/third-party/analytics/baidu-analytics.js INFO Generated: tags/one/index.html INFO Generated: js/third-party/comments/changyan.js INFO Generated: js/third-party/math/mathjax.js INFO Generated: css/main.css INFO Generated: js/third-party/chat/tidio.js INFO Generated: js/third-party/search/algolia-search.js INFO Generated: js/third-party/tags/mermaid.js INFO Generated: js/third-party/statistics/firestore.js INFO Generated: js/comments-buttons.js INFO Generated: archives/2025/index.html INFO Generated: js/config.js INFO Generated: js/bookmark.js INFO Generated: js/comments.js INFO Generated: css/noscript.css INFO Generated: js/schedule.js INFO Generated: js/next-boot.js INFO Generated: js/motion.js INFO Generated: js/sidebar.js INFO Generated: js/pjax.js INFO Generated: js/third-party/fancybox.js INFO Generated: js/third-party/pace.js INFO Generated: js/third-party/analytics/google-analytics.js INFO Generated: js/third-party/quicklink.js INFO Generated: js/utils.js INFO Generated: js/third-party/analytics/matomo.js INFO Generated: js/third-party/analytics/growingio.js INFO Generated: js/third-party/comments/utterances.js INFO Generated: js/third-party/comments/disqusjs.js INFO Generated: js/third-party/comments/livere.js INFO Generated: js/third-party/comments/disqus.js INFO Generated: js/third-party/chat/chatra.js INFO Generated: js/third-party/math/katex.js INFO Generated: js/third-party/tags/wavedrom.js INFO Generated: js/third-party/comments/gitalk.js INFO Generated: js/third-party/comments/isso.js INFO Generated: js/third-party/statistics/lean-analytics.js INFO Generated: js/third-party/search/local-search.js INFO Generated: js/third-party/tags/pdf.js INFO 53 files generated in 340 ms INFO Validating config INFO ================================== ███╗ ██╗███████╗██╗ ██╗████████╗ ████╗ ██║██╔════╝╚██╗██╔╝╚══██╔══╝ ██╔██╗ ██║█████╗ ╚███╔╝ ██║ ██║╚██╗██║██╔══╝ ██╔██╗ ██║ ██║ ╚████║███████╗██╔╝ ██╗ ██║ ╚═╝ ╚═══╝╚══════╝╚═╝ ╚═╝ ╚═╝ ======================================== NexT version 8.26.0 Documentation: https://theme-next.js.org ======================================== INFO Start processing INFO Hexo is running at http://localhost:4000/ . Press Ctrl+C to stop.
打包Hexo + NexT上传到Github仓库
1 2 3 4 5 6 7 8 9 10 11 12 13 14 15 16 17 18 19 20 # 删除 Next 主题目录中的 .git 子仓库信息, # 避免 Git 将其识别为独立仓库或 submodule, # 确保主题文件能被主 Hexo 项目正常跟踪和提交。 # (仅在 Linux/macOS 下使用;Windows 用户需用资源管理器或 PowerShell 删除) rm -rf blog/themes/next/.git # 删除 .gitignore(不删除这个忽略文件会导致Github Actions失败) rm -f blog/themes/next/.gitignore # 将定制后的 Next 主题目录(现在已是普通文件夹)添加到 Git 暂存区, # 使其纳入主项目的版本控制。 git add blog/themes/next -f # 提交本次变更,记录“新增了已定制的 Next 主题”这一操作, # 方便后续追溯和协作。 git commit -m "feat: add customized next theme" # 将本地提交推送到远程 GitHub 仓库的 main 分支, # 完成源码同步,为后续 GitHub Actions 自动构建部署做准备。 git push origin main
NexT主题配置 next-theme/hexo-theme-next 提供了完善的在线文档:Welcome to the NexT Organization!
NexT同样提供了配置文件./themes/next/_config.yml,可以将该文件复制到Hexo路径下,命名为_config.next.yml,后续可以操作该文件进行主题修改。
1 2 3 (base) zjykzj@LAPTOP-S3BIPLGN:~/repos/zjykzj.github.io/blog$ cp themes/next/_config.yml _config.next.yml (base) zjykzj@LAPTOP-S3BIPLGN:~/repos/zjykzj.github.io/blog$ ls _config.landscape.yml _config.next.yml _config.yml blog db.json node_modules package-lock.json package.json public scaffolds source themes yarn.lock
视觉布局方案 1 2 3 4 5 6 7 8 9 10 11 12 13 14 15 16 17 18 19 20 21 22 23 24 25 26 27 28 29 30 31 32 33 34 35 36 37 38 # --------------------------------------------------------------- # Scheme Settings # --------------------------------------------------------------- # 此部分用于选择 NexT 主题的视觉布局方案(Scheme),不同方案具有不同的侧边栏位置、宽度和整体风格。 # Schemes #scheme: Muse #scheme: Mist #scheme: Pisces scheme: Gemini # 上述四行中,只有未被注释(即没有 # 前缀)的 `scheme: Gemini` 会生效。 # NexT 提供四种官方 Scheme,区别如下: # - Muse:经典布局,左侧固定窄侧边栏,内容居中,适合传统博客。 # - Mist:极简风格,首页仅显示文章标题与简短摘要,强调文字内容,无侧边栏。 # - Pisces:右侧宽侧边栏,支持更多小工具(widgets),现代感强。 # - Gemini:双栏布局,类似 Pisces,但整体更紧凑,主内容区与侧边栏间距更合理,视觉平衡性好。 # 当前启用的是 Gemini 方案。 # Dark Mode darkmode: false # 是否默认启用深色(暗色)主题。 # - true:网站加载时直接使用深色样式。 # - false:使用浅色主题(默认)。 # 注意:即使设为 false,用户仍可通过浏览器手动切换(如果启用了 lightdark 自动模式)。 # Light-Dark Mode lightdark: enable: false # 是否启用“基于系统偏好或 CSS light-dark() 函数”的自动亮/暗模式切换。 # - true:尝试根据用户操作系统设置(如 macOS/iOS 的深色模式)自动切换主题。 # - false:禁用此功能(当前设置)。 # 此功能依赖现代浏览器对 CSS `color: light-dark(...)` 的支持。 # Add @supports (color: light-dark(red, red)) check check_supports: true # 当 enable: true 时,是否通过 CSS 的 @supports 规则检测浏览器是否支持 light-dark() 语法。 # 设为 true 可提高兼容性,避免在不支持的浏览器中出错。 # 由于 enable: false,此选项当前不生效。
CC 许可证类型 1 2 3 4 5 6 7 8 9 10 11 12 13 14 15 16 17 18 19 20 21 22 23 24 25 26 27 28 29 30 31 32 33 34 35 36 37 38 39 40 # Creative Commons 4.0 International License. # See: https://creativecommons.org/about/cclicenses/ # 这部分配置用于在你的博客中显示 Creative Commons(CC)许可证图标和声明, # 表明你对网站内容的版权许可方式。 creative_commons: # Available values: by | by-nc | by-nc-nd | by-nc-sa | by-nd | by-sa | cc-zero license: by-nc-sa # 指定你选择的 CC 许可证类型。当前设置为 "by-nc-sa",含义如下: # - BY(署名):使用者必须注明原作者。 # - NC(非商业性):不得用于商业目的。 # - SA(相同方式共享):若修改或再创作,必须以相同的许可证发布。 # 其他可选项说明: # by → 允许任何用途(包括商业),只需署名。 # by-nc → 仅限非商业用途,需署名。 # by-nc-nd → 非商业、禁止演绎(不能修改)、需署名。 # by-nc-sa → 非商业、可修改但必须相同方式共享、需署名。(当前设置) # by-nd → 允许商业使用,但禁止修改,需署名。 # by-sa → 允许商业使用,可修改但必须相同方式共享,需署名。 # cc-zero → 放弃版权,进入公共领域(类似 CC0)。 # Available values: big | small size: small # 设置许可证图标的大小。"small" 表示使用较小的图标,"big" 则为较大图标。 sidebar: true # 是否在网站侧边栏(Sidebar)底部显示 CC 许可证图标和链接。 # true 表示启用 —— 所有页面的侧边栏都会显示授权信息。 post: true # 是否在每篇文章的末尾显示 CC 许可证信息。 # true 表示启用 —— 读者在阅读完文章后能看到版权声明,推荐开启以明确单篇内容的授权。 # You can set a language value if you prefer a translated version of CC license, e.g. deed.zh # CC licenses are available in 39 languages, you can find the specific and correct abbreviation you need on https://creativecommons.org language: # 指定许可证页面的语言版本(如中文用 "deed.zh")。 # 留空表示使用默认语言(通常是英文)。 # 示例:language: deed.zh 会链接到中文版的许可证页面。 # 可选语言代码列表见:https://creativecommons.org/choose/?lang=zh
网站导航菜单 1 2 3 4 5 6 7 8 9 10 11 12 13 14 15 16 17 18 19 20 21 22 23 24 25 26 27 28 29 30 31 32 33 34 35 36 37 38 39 40 41 42 43 44 45 46 47 48 49 # --------------------------------------------------------------- # Menu Settings # --------------------------------------------------------------- # 此部分定义网站导航菜单的内容、链接和图标。 # Usage: `Key: /link/ || icon` # - Key:菜单项的标识名(如 home、about),区分大小写。 # 如果主题的语言文件(如 languages/zh-CN.yml)中包含该 Key 的翻译, # 则会自动显示对应语言的文本(例如 "home" → “首页”); # 若无翻译,则直接显示 Key 本身。 # - `/link/`:菜单点击后跳转的 URL。站内路径以 / 开头,外部链接需以 http:// 或 https:// 开头。 # - `||` 后面是 Font Awesome 图标类名(基于 Font Awesome 4.x,如 fa fa-home)。 menu: home: / || fa fa-home # 显示“首页”,链接到网站根目录 /,图标为房屋。 about: /about/ || fa fa-user # 显示“关于”,链接到 /about/ 页面,图标为用户头像。 # 注意:需确保已通过 `hexo new page about` 创建了该页面。 tags: /tags/ || fa fa-tags # 显示“标签”,链接到标签云页面 /tags/,图标为标签。 # 需在文章 Front-matter 中使用 tags 才会有内容。 categories: /categories/ || fa fa-th # 显示“分类”,链接到分类列表页 /categories/,图标为九宫格。 # 需在文章中设置 category 才会生成分类。 archives: /archives/ || fa fa-archive # 显示“归档”,链接到文章归档页 /archives/,图标为档案盒。 # Hexo 默认生成此页面,无需手动创建。 #schedule: /schedule/ || fa fa-calendar #sitemap: /sitemap.xml || fa fa-sitemap #commonweal: /404/ || fa fa-heartbeat # 上述三项被注释,未启用。 # 如需启用日程表、站点地图或公益 404 页面,可取消注释并确保对应页面存在。 # Enable / Disable menu icons / item badges. menu_settings: icons: true # 启用菜单图标(即显示 fa fa-xxx 对应的图标)。 badges: true # 启用菜单项角标(badge)。 # 角标通常用于显示数量,例如: # - 归档页显示文章总数 # - 标签页显示标签数量 # - 分类页显示分类数 # 具体是否显示取决于主题版本及页面数据。 # 若某些菜单项没有对应数据,角标可能不会出现。
除了在配置文件中开启上述选项外,还需要
创建about页面
1 2 3 4 5 6 7 8 9 10 11 12 node@7a8222b21ebc:/blog$ hexo new page about INFO Validating config INFO Created: /blog/source/about/index.md # # 在/blog/source/about/index.md编写自己的介绍 --- title: 关于 date: 2025-12-06 12:14:15 comments: false --- 编写你自己的介绍
创建tags页面
1 2 3 4 5 6 7 8 9 10 11 node@7a8222b21ebc:/blog$ hexo new page tags INFO Validating config INFO Created: /blog/source/tags/index.md # # 修改index.md的Front-matter,设置type: tags --- title: 标签 date: 2025-12-06 12:16:56 type: tags comments: false ---
创建categories页面
1 2 3 4 5 6 7 8 9 10 11 node@7a8222b21ebc:/blog$ hexo new page categories INFO Validating config INFO Created: /blog/source/categories/index.md # # 修改index.md的Front-matter,设置type: categories --- title: 类别 date: 2025-12-06 12:20:14 type: categories comments: false ---
侧边栏设置 侧边栏图标 配置侧边栏图标,将自定义的图标放置到themes/next/source/images/,修改配置文件
1 2 3 4 5 6 7 8 9 10 11 12 13 14 15 16 17 18 19 20 21 22 23 24 25 26 27 # Sidebar Avatar avatar: # Replace the default image and set the url here. url: #/images/avatar.gif # 指定头像图片的路径。当前该行被注释(以 # 开头),表示尚未启用自定义头像, # 网站将显示默认空白头像或不显示头像(取决于主题版本)。 # # 要启用自定义头像,请: # 1. 将你的头像图片(如 avatar.png 或 avatar.jpg)放入 Hexo 项目的 `source/images/` 目录; # 2. 删除行首的 # 号,并填写正确路径,例如: # url: /images/avatar.png # # 支持本地路径(以 / 开头)或外部 URL(如 https://example.com/avatar.jpg)。 # If true, the avatar will be displayed in circle. rounded: true # 启用圆形头像显示。 # - true:通过 CSS 将头像裁剪为圆形(使用 border-radius: 50%)。 # - false:保持原始矩形。 # 当前设为 true,因此一旦设置了有效头像,它将以圆形呈现,视觉更现代、统一。 # If true, the avatar will be rotated with the cursor. rotated: true # 启用鼠标悬停旋转动画。 # - true:当用户将鼠标悬停在头像上时,头像会顺时针平滑旋转 360 度。 # - false:无动画效果。 # 当前设为 true,增加了交互趣味性,但建议确保头像内容适合旋转(如对称或无文字)。
自己社交链接 1 2 3 4 5 6 7 8 9 10 11 12 13 14 15 16 17 18 19 20 21 22 23 24 25 26 27 28 29 30 31 32 33 34 35 36 37 # Social Links # Usage: `Key: permalink || icon` # - Key:显示给用户的社交平台名称(如 "GitHub"、"E-Mail"),可自定义文字。 # - permalink:点击后跳转的链接。注意: # • 外部链接需以 http:// 或 https:// 开头; # • 邮箱应使用 mailto:your@email.com 格式; # • Skype 等特殊协议也支持(如 skype:username?call)。 # - || 后面是 Font Awesome 图标类名,用于显示对应平台图标。 # 注意:NexT 默认使用 Font Awesome 5(或兼容 4),因此: # • 普通图标用 fa(如 fa-envelope) # • 品牌图标用 fab(如 fab fa-github) social: #GitHub: https://github.com/yourname || fab fa-github #E-Mail: mailto:yourname@gmail.com || fa fa-envelope #Weibo: https://weibo.com/yourname || fab fa-weibo #Twitter: https://twitter.com/yourname || fab fa-twitter #FB Page: https://www.facebook.com/yourname || fab fa-facebook #StackOverflow: https://stackoverflow.com/yourname || fab fa-stack-overflow #YouTube: https://youtube.com/yourname || fab fa-youtube #Instagram: https://instagram.com/yourname || fab fa-instagram #Skype: skype:yourname?call|chat || fab fa-skype # 所有社交链接当前都被注释(以 # 开头),因此不会显示在网站上。 # 要启用某一项,只需删除该行开头的 #,并替换 yourname 为你的实际账号或链接。 # 示例(启用 GitHub 和邮箱): # GitHub: https://github.com/johndoe || fab fa-github # 邮箱: mailto:johndoe@example.com || fa fa-envelope social_icons: enable: true # 是否启用社交图标功能。true 表示启用(即使 social 列表为空也不会报错)。 icons_only: false # 是否仅显示图标,不显示文字标签。 # - false:同时显示图标 + 文字(如 🐙 GitHub); # - true:只显示图标(适合空间有限或追求极简风格)。 transition: false # 是否为图标添加悬停(hover)过渡动画(如颜色渐变、缩放等)。 # - true:启用平滑动画效果; # - false:无动画,响应更直接(默认推荐)。
推荐社交链接 1 2 3 4 5 6 7 8 9 10 11 12 13 14 15 16 17 18 19 20 21 22 23 24 25 26 27 28 29 30 31 32 # Blog rolls # “友链”功能用于在侧边栏或页面中展示你推荐的其他博客或网站链接。 links_settings: icon: fa fa-globe # 设置友链标题前显示的 Font Awesome 图标。 # 默认使用地球图标(fa fa-globe),你也可以换成其他图标,例如: # - fa fa-link(链接) # - fab fa-blogger(博客) # - fab fa-internet-explorer(浏览器) # 注意:品牌图标需用 `fab` 前缀(如 fab fa-github)。 # Available values: block | inline layout: block # 控制友链的排列方式: # - block:每个链接独占一行(垂直排列),适合侧边栏展示,清晰易读; # - inline:所有链接在同一行内水平排列(用空格或分隔符隔开),适合页脚或紧凑布局。 # 当前设为 block,表示友链将以列表形式垂直显示。 links: #Title: https://example.com # 友链列表格式:`显示名称: 链接地址` # - "Title" 是访客看到的链接文字(可使用中文,如“张三的博客”); # - 链接必须以 http:// 或 https:// 开头(外部链接)。 # # 示例(取消注释并替换为你自己的友链): # 小明的博客: https://xiaoming.com # 技术周刊: https://weekly.tech # # ⚠️ 注意:当前 links 下的所有内容都被注释(以 # 开头), # 因此即使启用了友链功能,也不会显示任何链接。 # 要生效,必须添加至少一条未注释的记录。
侧边栏TOC 1 2 3 4 5 6 7 8 9 10 11 12 13 14 15 16 17 18 19 20 21 22 23 24 25 26 27 28 29 30 31 32 33 34 35 36 37 38 39 40 # Table of Contents in the Sidebar # 此功能会在文章页面的侧边栏自动生成一个“目录”,方便读者快速跳转到不同章节。 toc: enable: true # 是否启用文章目录功能。 # - true:在文章页(post)侧边栏显示 TOC; # - false:不显示目录。 # 当前已启用。 # Automatically add list number to toc. number: true # 是否为目录项自动添加编号(如 1.、1.1、1.2 等)。 # - true:生成带层级编号的目录(适合技术文档、教程类文章); # - false:仅显示标题文字,无编号。 # 当前开启编号,提升结构清晰度。 # If true, all words will placed on next lines if header width longer then sidebar width. wrap: true # 当目录中的标题文字过长、超出侧边栏宽度时,是否自动换行。 # - true:长标题会折行显示,避免溢出或隐藏; # - false:标题强制单行显示,超出部分可能被截断或出现滚动条。 # 建议保持 true,提升可读性。 # If true, all level of TOC in a post will be displayed, rather than the activated part of it. expand_all: true # 是否展开目录中的所有层级(默认折叠子项)。 # - true:无论用户是否滚动到某章节,整个目录树完全展开; # - false:仅展开当前激活(可见)章节的父级和子级(动态高亮模式)。 # 当前设为 true,适合希望一眼看到全文结构的场景。 # Maximum heading depth of generated toc. max_depth: 6 # 限制目录生成的最大标题层级(对应 Markdown 中的 # 到 ######)。 # - 1:只显示一级标题(#) # - 2:显示一、二级(#、##) # - ... # - 6:显示全部六级标题(Markdown 最大支持 6 级) # 当前设为 6,表示包含所有层级的标题。 # 若文章结构较深,可适当降低(如 3 或 4)以避免目录过于冗长。
页脚设置 1 2 3 4 5 6 7 8 9 10 11 12 13 14 15 16 17 18 19 20 21 22 23 24 25 26 27 28 29 30 31 32 33 34 35 36 37 38 39 40 41 42 43 44 45 46 47 48 49 50 51 52 53 54 55 56 57 58 59 60 61 62 63 64 # Show multilingual switcher in footer. language_switcher: false # 是否在页脚显示多语言切换按钮。 # - true:当站点配置了多种语言(如 zh-CN、en)时,页脚会显示 [中文] [English] 切换链接; # - false:不显示(当前设置),适合单语言博客。 footer: # Specify the year when the site was setup. If not defined, current year will be used. since: 2019 # 网站起始年份。启用后,版权年份将显示为范围形式: # © 2019 – 2025(2025 为当前系统年份) # 若未设置,则仅显示 © 2025。 # 此设置有助于体现建站历史,推荐保留。 # Icon between year and copyright info. icon: # Icon name in Font Awesome. See: https://fontawesome.com/icons name: fa fa-heart # 在年份和作者名之间插入一个图标。当前使用的是 Font Awesome 的“心形”图标。 # 注意:这是 FA 4 的写法;若主题使用 FA 5+,建议改为 `fas fa-heart`(但 NexT 通常兼容旧语法)。 # If you want to animate the icon, set it to true. animated: true # 启用心形图标的动画效果(通常是轻微跳动或脉动)。 # 需要主题支持 CSS 动画(NexT 默认支持),开启后更具活力。 # Change the color of icon, using Hex Code. color: "#ff0000" # 图标颜色设为红色(标准红),与爱心主题契合。 # 可根据网站主色调调整,例如粉色 "#ff69b4" 或深红 "#b22222"。 # If not defined, `author` from Hexo `_config.yml` will be used. # Set to `false` to disable the copyright statement. copyright: # 版权信息中的作者名称。 # - 留空(当前状态):自动读取 Hexo 主配置文件 `_config.yml` 中的 `author` 字段; # - 填写自定义文字(如 "张三的博客"):覆盖默认作者名; # - 设为 `false`:完全隐藏整行版权语句(包括年份和图标)。 # Powered by Hexo & NexT powered: true # 是否显示技术声明:“Powered by Hexo & NexT.Gemini”。 # - true:显示(默认,支持开源项目); # - false:隐藏,使页脚更简洁。 # Beian ICP and gongan information for Chinese users. beian: enable: false # 是否启用中国大陆网站备案信息(ICP + 公安备案)。 # 当前关闭,适合非大陆站点或未备案用户。 icp: # 工信部 ICP 备案号,例如:京ICP备12345678号。 # 需先在 https://beian.miit.gov.cn 完成备案。 gongan_id: # 公安备案编号中的纯数字部分(用于生成公安链接)。 gongan_num: # 完整的公安备案号,例如:京公网安备11010102000001号。 gongan_icon_url: # 公安备案图标 URL(从 https://beian.mps.gov.cn 下载), # 启用后会在 ICP 号旁显示官方盾牌图标。
文章设置 元信息展示 1 2 3 4 5 6 7 8 9 10 11 12 13 14 15 16 17 18 19 20 21 22 23 24 25 26 27 28 29 30 31 32 33 34 35 36 37 38 39 40 41 42 43 44 45 46 47 48 49 50 51 52 53 54 55 56 57 58 59 60 61 62 63 64 65 66 67 68 69 70 71 72 # --------------------------------------------------------------- # Post Settings # See: https://theme-next.js.org/docs/theme-settings/posts # --------------------------------------------------------------- # 此部分控制文章在首页摘要、文章页元信息、字数统计、标签显示等方面的行为。 # Use `description` in front-matter to specify post excerpt. excerpt_description: true # 是否优先使用文章 Front-matter 中的 `description` 字段作为首页摘要。 # - true:若文章头部有 description,则用它作为摘要(推荐,可控性强); # - false:忽略 description,改用 <!-- more --> 之前的内容或自动截取。 # 当前启用,建议在每篇文章中手动写一段简洁的 description。 # Read more button # If true, the read more button will be displayed in excerpt section. read_more_btn: true # 是否在首页/归档页的文章摘要末尾显示“Read More”按钮。 # - true:显示“阅读更多”链接(默认文本可国际化); # - false:不显示按钮(仅显示摘要)。 # 当前启用,提升用户点击进入全文的引导性。 # Post meta display settings post_meta: item_text: true # 是否在元信息旁显示描述性文字(如“创建于”、“分类于”等)。 # - true:显示文字(例如:“创建于 2025-01-01”); # - false:仅显示图标和日期/分类(更简洁)。 created_at: true # 是否显示文章创建时间。 # - true:在文章页和首页摘要中显示发布时间; # - false:隐藏。 updated_at: enable: true # 是否显示文章更新时间。 # - true:当文章 Front-matter 中有 `updated` 字段时,显示最后修改时间; # - false:不显示。 another_day: true # 控制更新时间的显示逻辑: # - true:仅当更新日期与创建日期**不同天**时,才显示“更新于”标签; # 若同一天更新,仅在鼠标悬停时间上显示具体修改时间(popup); # - false:无论是否同一天,都强制显示“更新于”。 # 当前设为 true,避免冗余信息(例如当天编辑不额外标出“更新”)。 categories: true # 是否在文章元信息中显示分类(categories)。 # - true:显示(如“分类于 技术”); # - false:隐藏。 # Post wordcount display settings # Dependencies: https://github.com/next-theme/hexo-word-counter symbols_count_time: separated_meta: true # 是否将“字数”和“阅读时长”分两行显示。 # - true:字数一行,阅读时间一行(更清晰); # - false:合并到同一行(节省空间)。 # 注意:需先安装 hexo-word-counter 插件,否则不生效。 item_text_total: false # 是否在网站页脚显示“总字数”和“总阅读时间”的文字说明。 # - true:显示完整语句,如“本站共写了 100,000 字”; # - false:仅显示数字和单位(如 “100k 字 | 5h”),更简洁。 # 当前设为 false,适合追求干净页脚的用户。 # Use icon instead of the symbol # to indicate the tag at the bottom of the post tag_icon: false # 文章底部的标签(Tags)前是否用图标替代默认的 # 符号。 # - true:使用 Font Awesome 标签图标(如 fa fa-tag); # - false:使用传统的 # 前缀(如 #Hexo #NexT)。 # 当前保留默认的 # 符号风格。
对于文章字数统计,需要额外安装插件hexo-word-counter
1 2 3 4 5 6 7 8 9 10 11 12 13 14 15 16 17 18 19 20 21 22 23 24 25 26 27 28 29 30 31 32 33 34 35 36 37 38 39 40 node@7a8222b21ebc:/blog$ npm install hexo-word-counter added 2 packages, and audited 245 packages in 21s 43 packages are looking for funding run `npm fund` for details found 0 vulnerabilities node@7a8222b21ebc:/blog$ node@7a8222b21ebc:/blog$ cat package.json { "name": "hexo-site", "version": "0.0.0", "private": true, "scripts": { "build": "hexo generate", "clean": "hexo clean", "deploy": "hexo deploy", "server": "hexo server", "cg": "hexo clean && hexo generate", "dev": "hexo clean && hexo generate && hexo server" }, "hexo": { "version": "8.1.1" }, "dependencies": { "hexo": "^8.0.0", "hexo-abbrlink": "^2.2.1", "hexo-generator-archive": "^2.0.0", "hexo-generator-category": "^2.0.0", "hexo-generator-index": "^4.0.0", "hexo-generator-tag": "^2.0.0", "hexo-renderer-ejs": "^2.0.0", "hexo-renderer-marked": "^7.0.0", "hexo-renderer-stylus": "^3.0.1", "hexo-server": "^3.0.0", "hexo-theme-landscape": "^1.0.0", "hexo-word-counter": "^0.2.1" <--------------- This } }
奖励设置 1 2 3 4 5 6 7 8 9 10 11 12 13 14 15 16 17 18 19 20 21 22 23 24 25 26 27 28 29 # Donate (Sponsor) settings # 此功能允许读者通过扫描二维码对你进行小额赞助(如微信、支付宝等), # 通常显示在每篇文章末尾,位于评论区上方。 # Front-matter variable (nonsupport animation). reward_settings: # If true, a donate button will be displayed in every article by default. enable: true # ✅ 已全局启用打赏功能。 # 所有文章(除非在 Front-matter 中显式设置 `reward: false`)都会显示“打赏”按钮。 animation: true # ✅ 启用展开动画。 # 当用户点击“打赏”按钮时,二维码区域将以平滑的淡入或滑动效果展开, # 提升交互体验(需主题支持 CSS 动画,NexT 默认支持)。 reward: wechatpay: /images/wechatpay.png # 微信收款码图片路径。图片应放在 Hexo 项目的 `source/images/` 目录下。 # 文件名:wechatpay.png(建议尺寸 200×200 或 300×300,PNG 格式支持透明背景)。 alipay: /images/alipay.jpg # 支付宝收款码图片路径。同样需放入 `source/images/`。 # 注意:此处使用 .jpg 格式,确保图片清晰可扫(推荐使用高清截图)。 #paypal: /images/paypal.png #bitcoin: /images/bitcoin.png # PayPal 和比特币选项当前被注释,未启用。 # 如需添加,取消注释并提供对应二维码即可。
相关文章推荐 安装插件
1 npm install hexo-related-posts
在_config.next.yml文件中启动该功能
1 2 3 4 5 6 # Related popular posts # Dependencies: https://github.com/next-theme/hexo-posts-embedding # Or: https://github.com/sergeyzwezdin/hexo-related-posts related_posts: enable: true icon: fa fa-signs-post
404页面 创建文件source/404.md,在文章链接不存在跳转到腾讯提供的公益广告,参考Commonweal 404
1 2 3 4 5 6 7 --- title: 404 date: 2025-12-07 15:04:52 comments: false --- <script type="text/javascript" src="//qzonestyle.gtimg.cn/qzone/hybrid/app/404/search_children.js" charset="utf-8" homePageUrl="/" homePageName="回到我的主页"></script>
如果使用nginx托管,那么需要在nginx配置文件中指定跳转到404.html
1 error_page 404 /404.html;
点击图片放大 NexT集成了两种功能来实现点击图片放大功能:fancybox和mediumzoom。
1 2 3 4 5 6 7 8 9 10 11 12 # FancyBox 是一个功能丰富的灯箱(Lightbox)插件, # 支持图片、视频、图集、iframe 等多种内容的弹窗展示, # 提供箭头导航、标题、缩略图、键盘控制等高级交互。 # 官网:https://fancyapps.com/fancybox/ fancybox: false # ← 当前已禁用 FancyBox # Medium Zoom 是一个轻量级 JavaScript 库, # 专为实现类似 Medium.com 的图片点击放大效果而设计, # 特点是无 UI 干扰、平滑缩放、体积小(约 5KB)、性能高。 # 官网:https://medium-zoom.francoischalifour.com # ⚠️ 警告:不要同时启用 fancybox 和 mediumzoom,否则会冲突! mediumzoom: true # ← 当前已启用 Medium Zoom
字体设置 NexT默认采用https://fonts.googleapis.com的Lato字体。针对国内中文场景使用,我选择了Noto Serif SC字体,并且配置国内字体源https://fonts.loli.net。
1 2 3 4 5 6 7 8 9 10 11 12 13 14 15 16 17 18 19 20 21 22 23 24 25 26 27 28 29 30 31 32 33 34 35 36 37 38 39 40 41 42 43 44 45 46 47 48 49 50 51 # --------------------------------------------------------------- # Font Settings # --------------------------------------------------------------- # Find fonts on Google Fonts (https://fonts.google.com) # All fonts set here will have the following styles: # light | light italic | normal | normal italic | bold | bold italic # Be aware that setting too much fonts will cause site loading slowly # --------------------------------------------------------------- # Web Safe fonts are recommended for `global` (and `title`): # Arial | Tahoma | Helvetica | Times New Roman | Courier New | Verdana | Georgia | Palatino | Garamond | Comic Sans MS | Trebuchet MS # --------------------------------------------------------------- font: enable: true # Uri of fonts host, e.g. https://fonts.googleapis.com (Default). host: https://fonts.loli.net # Font options: # `external: true` will load this font family from `host` above. # `family: Times New Roman`. Without any quotes. # `size: x.x`. Use `em` as unit. Default: 1 (16px) # Global font settings used for all elements inside <body>. global: external: true # family: Lato family: Noto Serif SC size: # Font settings for site title (.site-title). title: external: true family: size: # Font settings for headlines (<h1> to <h6>). headings: external: true family: size: # Font settings for posts (.post-body). posts: external: true family: # Font settings for <code> and code blocks. codes: external: true family:
调整文章区域宽度 NexT.Gemini主题展示的页面中两侧背景留白太多,我希望能够进一步提高文章区域宽度。
创建配置文件source/_data/variables.styl
1 2 3 // 覆盖 Gemini/Pisces 的桌面端最大宽度比例 $content-desktop-largest = 85% $content-desktop-large = 85em
在_config.next.yml文件中启用配置文件
1 2 3 4 5 6 7 8 9 10 11 12 13 14 15 # Define custom file paths. # Create your custom files in site directory `source/_data` and uncomment needed files below. custom_file_path: #head: source/_data/head.njk #header: source/_data/header.njk #sidebar: source/_data/sidebar.njk #postMeta: source/_data/post-meta.njk #postBodyStart: source/_data/post-body-start.njk #postBodyEnd: source/_data/post-body-end.njk footer: source/_data/footer.njk #bodyEnd: source/_data/body-end.njk #variable: source/_data/variables.styl #mixin: source/_data/mixins.styl #style: source/_data/styles.styl variable: source/_data/variables.styl
其他设置 Back To Top 1 2 3 4 5 6 7 8 9 10 11 12 13 14 15 16 17 18 19 20 21 22 back2top: enable: true # 是否启用“返回顶部”按钮。 # - true:当页面向下滚动一定距离后,显示一个可点击的“返回顶部”按钮; # - false:完全禁用该功能。 # 当前已启用,提升长文阅读体验。 # Back to top in sidebar. sidebar: true # 控制“返回顶部”按钮的显示位置: # - true:按钮固定在**侧边栏内**(通常在侧边栏底部,随侧边栏一起定位); # - false:按钮固定在**页面右下角**(浮动于内容之上,不依赖侧边栏)。 # # 注意:在 Gemini / Pisces 等双栏布局中,设为 true 可使按钮与侧边栏对齐,视觉更统一; # 在 Muse / Mist 中,可能因无固定侧边栏而表现不同。 # Scroll percent label in b2t button. scrollpercent: true # 是否在“返回顶部”按钮上显示当前页面滚动百分比(如 “35%”)。 # - true:按钮文字为动态百分比(例如 “72%”),点击后回到顶部; # - false:按钮显示固定图标或文字(如 “↑” 或 “Top”)。 # 当前启用,用户可直观了解阅读进度。
GitHub Banner 1 2 3 4 5 6 7 8 9 10 11 12 13 14 15 # `Follow me on GitHub` banner in the top-right corner. github_banner: enable: true # 是否在网站右上角显示 GitHub 角标横幅(通常是一个带 GitHub 图标的飘带或小旗帜)。 # - true:启用 GitHub 横幅; # - false:隐藏(默认)。 # 当前已启用,访客一眼就能看到你的 GitHub 链接。 permalink: https://github.com/yourname # 点击横幅后跳转的目标地址。 # 请务必将 `yourname` 替换为你的实际 GitHub 用户名,例如: # permalink: https://github.com/johndoe # # ⚠️ 注意:当前仍保留占位符 `yourname`,若不修改, # 点击横幅会跳转到一个不存在的 GitHub 页面(404)。
动态背景 NexT提供了动态彩带背景配置:Canvas Ribbon ,相比较之下我个人更喜欢之前的粒子连线背景,参考theme-next/theme-next-canvas-nest 。
创建自定义source/_data/footer.njk
1 2 3 4 5 6 7 8 <!-- Canvas Nest 动态背景脚本 --> <script color="17,63,61" <!-- 粒子连线颜色:深青绿色(RGB 格式,对应十六进制 #113F3D) --> opacity="1" <!-- 线条不透明度:1 表示完全不透明,视觉效果浓重、清晰 --> zIndex="-1" <!-- 层级:-1 确保 canvas 位于页面内容下方,不遮挡文字或交互元素 --> count="199" <!-- 粒子数量:199 个点,形成密集、细腻的动态网络效果 --> src="https://cdn.jsdelivr.net/npm/canvas-nest.js@1/dist/canvas-nest.js"> </script>
在_config.next.yml中启用自定义footer
1 2 3 4 5 6 7 8 9 10 11 12 13 14 # Define custom file paths. # Create your custom files in site directory `source/_data` and uncomment needed files below. custom_file_path: #head: source/_data/head.njk #header: source/_data/header.njk #sidebar: source/_data/sidebar.njk #postMeta: source/_data/post-meta.njk #postBodyStart: source/_data/post-body-start.njk #postBodyEnd: source/_data/post-body-end.njk footer: source/_data/footer.njk #bodyEnd: source/_data/body-end.njk #variable: source/_data/variables.styl #mixin: source/_data/mixins.styl #style: source/_data/styles.styl
禁用其他canvas插件(避免冲突)
1 2 canvas_ribbon: enable: false
1 2 3 4 5 6 7 8 9 10 11 12 13 14 15 16 17 18 19 20 21 22 23 24 25 26 27 28 29 30 31 32 33 34 35 36 37 38 39 40 41 42 43 44 node@7a8222b21ebc:/blog$ npm install hexo-generator-feed --save --legacy-peer-deps added 8 packages, and audited 344 packages in 20s 59 packages are looking for funding run `npm fund` for details found 0 vulnerabilities # # 在Hexo _config.yml中添加配置 # Feed Atom (RSS) # Dependencies: https://github.com/hexojs/hexo-generator-feed feed: type: atom # 输出类型:atom 或 rss2,默认是 atom path: atom.xml # RSS 文件路径,默认是 atom.xml limit: 20 # 每次输出的文章数量限制,默认是 20 篇 hub: # 可选,用于 PubSubHubbub 的 Hub URL content: true # 是否包含文章全文,默认是 false(仅标题和摘要) content_limit: 140 # 如果不输出全文,则可以设置摘要长度限制,默认是 140 字符 sort: -date # 排序方式,默认是按日期降序排列 icon: icon.png # 可选,自定义 feed 图标 autodiscovery: true # 是否自动在页面头部添加发现链接,默认是 true # # 每次编译后就会在public文件夹下生成atom.xml文件 # # 在_config.next.yml配置侧边栏菜单,可以展示RSS选项 # --------------------------------------------------------------- # Menu Settings # --------------------------------------------------------------- # Usage: `Key: /link/ || icon` # Key is the name of menu item. If the translation for this item is available, the translated text will be loaded, otherwise the Key name will be used. Key is case-sensitive. # Value before `||` delimiter is the target link, value after `||` delimiter is the name of Font Awesome icon. # External url should start with http:// or https:// menu: home: / || fa fa-home about: /about/ || fa fa-user tags: /tags/ || fa fa-tags categories: /categories/ || fa fa-th archives: /archives/ || fa fa-archive #schedule: /schedule/ || fa fa-calendar #sitemap: /sitemap.xml || fa fa-sitemap #commonweal: /404/ || fa fa-heartbeat RSS: /atom.xml || fa fa-rss
robots.txt 创建文件source/robots.txt,
允许爬虫抓取所有文章、首页、归档首页、分类首页、标签首页;
禁止抓取分页、资源文件、搜索页等低价值页面。
1 2 3 4 5 6 7 8 9 10 11 12 13 14 15 16 17 18 User-agent: * Disallow: /js/ Disallow: /css/ Disallow: /fonts/ Disallow: /images/ Disallow: /lib/ Disallow: /vendors/ Disallow: /fancybox/ Disallow: /search/ Disallow: /admin/ Disallow: /*?* Disallow: /*/comment-page-* Disallow: /*/page/ Disallow: /archives/*/page/ Disallow: /categories/*/page/ Disallow: /tags/*/page/ Sitemap: https://https://blog.zjykzj.cn/sitemap.xml
还需要安装插件
1 2 3 4 5 6 7 8 node@7a8222b21ebc:/blog$ npm install hexo-generator-sitemap --save --legacy-peer-deps added 8 packages, and audited 352 packages in 17s 59 packages are looking for funding run `npm fund` for details found 0 vulnerabilities
第三方服务 数学公式渲染 Hexo和NexT适配多种数学公式渲染插件,综合来看,我还是觉得插件hexo-filter-mathjax更加简单易用。它完全适配标准LaTeX数学公式语法,只需要注意它支持$$...$$(块级公式)和$...$(行内公式)即可。
可以在线编写LaTeX数学公式,然后粘贴到文章中:
1 2 3 4 5 6 7 8 9 10 11 12 13 14 15 16 17 18 19 # 安装 node@7a8222b21ebc:/blog$ npm install hexo-filter-mathjax --legacy-peer-deps npm warn deprecated mathjax-full@3.2.2: Version 4 replaces this package with the scoped package @mathjax/src added 9 packages, and audited 335 packages in 48s 59 packages are looking for funding run `npm fund` for details found 0 vulnerabilities # # 在Hexo _config.yml中启用。注意:是Hexo _config.yml,不是NexT的_config.next.yml # 启用 hexo-filter-mathjax 全局处理 mathjax: every_page: true # 可选:启用行内公式 $...$ single_dollars: true # 可选:自动注入 CSS append_css: true
评论系统 NexT继承了多种评论系统的第三方服务配置,当前采用Gitalk 方案,详细配置文档参考Comment Systems 。
第一步,在GitHub创建OAuth App
第二步:创建用于存储评论的GitHub仓库
第三步:配置NexT主题_config.yml(当前使用_config.next.yml)
注意一:要禁止评论功能,在Front-matter代码块中设置comments: false即可
注意二:Gitalk依赖于页面路径的md5值进行标记,如果页面的永久链接发生变化,评论将无法正确加载
1 2 3 4 5 6 7 8 9 10 11 12 13 14 15 16 17 18 19 20 21 22 # 仅启用评论系统 comments: style: tabs # 显示样式:tabs(标签页)或 buttons(按钮) active: gitalk # 默认激活的评论系统(留空则按 nav 顺序第一个) storage: true # 记住用户上次选择的评论系统(存 localStorage) lazyload: false # 是否懒加载(滚动到评论区再加载,建议 false 避免初始化失败) nav: #gitalk: # order: -2 # 调整显示顺序(数字越小越靠前) # Gitalk # https://github.com/gitalk/gitalk gitalk: enable: true github_id: your_github_username # ← 你的 GitHub 用户名(字符串) repo: gitalk-comments # ← 第二步创建的仓库名 client_id: YOUR_CLIENT_ID # ← 第一步获取的 Client ID client_secret: YOUR_CLIENT_SECRET # ← 第一步获取的 Client Secret admin_user: your_github_username # ← 管理员用户名(通常同 github_id) distraction_free_mode: true # 类似“纯净模式”,聚焦评论 proxy: https://cors-anywhere.azm.workers.dev/https://github.com/login/oauth/access_token # ↑ 可选但推荐:解决 GitHub OAuth 的 CORS 问题(国内尤其需要)
分析工具 对博客网站进行SEO搜索优化有兴趣的童鞋,可以考虑配置Google Analytics(GA)和Baidu Analytics(百度统计)。参考Statistics and Analytics
统计工具 使用不蒜子 来统计网站访问情况,参考Busuanzi Counting (China) 。
1 2 3 4 5 6 7 8 9 10 11 12 # 在_config.next.yml中启用不蒜子 # # Busuanzi Count # https://busuanzi.ibruce.info busuanzi_count: enable: true total_visitors: true # 显示站点总访客数(UV) total_visitors_icon: user # 可选:Font Awesome 图标名(如 'user', 'users') total_views: true # 显示站点总浏览量(PV) total_views_icon: eye # 可选:图标名(如 'eye', 'chart-bar') post_views: true # 在每篇文章 meta 中显示该文浏览量(PV) post_views_icon: far fa-eye # 注意:若用 solid/far/light 图标,需写全名
启用后,会在网站页脚和文章顶部展示相关统计信息。
SEO优化 想要提高博客在搜索引擎(如 Google、百度)中的收录率和排名,从而增加被用户搜索到的几率,可以生成sitemap.xml进行SEO优化。参考SEO Setting
站内搜索服务 NexT提供了依赖于第三方的搜索服务(Algolia Search)以及本地搜索插件hexo-generator-searchdb。我决定采用本地搜索功能,参考Local Search
1 2 3 4 5 6 7 8 9 10 11 12 13 14 15 16 17 18 19 20 21 22 23 24 node@7a8222b21ebc:/blog$ npm install hexo-generator-searchdb --legacy-peer-deps added 1 package, and audited 336 packages in 12s 59 packages are looking for funding run `npm fund` for details found 0 vulnerabilities # # 在Hexo _config.yml中配置 search: path: search.json # 生成的搜索数据库文件名(也可用 .json) field: post # 搜索范围:post(文章)、page(页面)、all content: true # 是否包含正文内容(false 则只搜标题) format: striptags # 内容格式:html / striptags / raw # # 在NexT _config.next.yml中配置 # Local search # Dependencies: https://github.com/next-theme/hexo-generator-searchdb local_search: enable: true # ✅ 启用搜索框(右上角会出现 🔍) top_n_per_article: 3 # ✅ 每篇文章最多显示 3 个匹配片段(合理值) unescape: false # ✅ 正确!因后端用 striptags,内容已是纯文本 preload: true # ✅ 预加载 search.json,首次搜索秒开
更新Docker容器 在操作Gitea Actions/Nginx之前更新zjykzj/hexo-env:latest,增加新软件的安装
1 2 3 4 5 6 7 8 9 10 11 12 13 14 15 16 17 18 19 20 21 22 23 24 25 26 27 28 29 30 31 32 # 使用 Node.js 20(LTS) FROM node:20 # 安装系统依赖:locales、git、时区 + CI/部署所需工具 # --no-install-recommends 减少镜像体积 RUN apt-get update && \ apt-get install -y --no-install-recommends \ locales \ git \ tzdata \ curl \ jq \ openssh-client \ && \ # 生成 en_US.UTF-8 locale localedef -i en_US -c -f UTF-8 -A /usr/share/locale/locale.alias en_US.UTF-8 && \ # 清理 apt 缓存(减小镜像大小) rm -rf /var/lib/apt/lists/* # 设置 UTF-8 环境变量(关键!避免中文乱码或脚本编码问题) ENV LANG=en_US.UTF-8 \ LANGUAGE=en_US:en \ LC_ALL=en_US.UTF-8 # 设置工作目录 WORKDIR /blog # 全局安装 Hexo CLI RUN npm install -g hexo-cli # 默认命令 CMD ["echo", "Use 'hexo init', 'hexo generate', or 'hexo server' as needed."]
编译镜像
1 2 3 # REPOSITORY TAG IMAGE ID CREATED SIZE # zjykzj/hexo-env latest 1188ca368bd9 23 seconds ago 1.14GB $ docker build -t zjykzj/hexo-env .
Gitea Actions/Nginx 参考文章[Vibe Coding][Act Runner]Gitea Actions ,在本地Gitea创建仓库HexoBlog,每次打tag v*会触发Gitea Actions,编译静态文件网站然后打包上传到香港服务器,同时触发Nginx托管博客网站。
创建CI&CD配置文件.gitea/workflows/hexo.yml
1 2 3 4 5 6 7 8 9 10 11 12 13 14 15 16 17 18 19 20 21 22 23 24 25 26 27 28 29 30 31 32 33 34 35 36 37 38 39 40 41 42 43 44 45 46 47 48 49 50 51 52 53 54 55 56 57 58 59 60 61 62 63 64 65 66 67 68 69 70 71 72 73 74 75 76 77 78 79 80 81 82 83 84 85 86 87 88 89 90 91 92 93 94 95 96 97 98 99 100 101 102 name: Upload & Deploy to Hong Kong Server (Docker Nginx) on: push: tags: - 'v*' jobs: upload-and-deploy: runs-on: ubuntu-latest container: zjykzj/hexo-env:latest # 👈 关键:整个 job 在此容器中运行 steps: # === 步骤 1:克隆仓库并切换到标签 === - name: Clone repository and checkout tag run: | git clone http://172.23.217.55:3000/zjykzj/HexoNexT.git . git fetch --tags git checkout ${{ gitea.ref_name }} # === 步骤 2:调试目录结构 === - name: "Debug: List directory structure" run: | pwd ls -la [ -d "blog" ] && ls -la blog/ || echo "❌ blog/ missing" # === 步骤 3:直接在容器内构建(无需 docker run!)=== - name: Build Hexo site run: | cd blog npm install --legacy-peer-deps --prefer-offline npm run cg # === 后续步骤:打包、上传、部署(SSH 部分仍需工具)=== - name: Install SSH client (if not in your image) run: | # 如果你的 hexo-env 镜像没有 ssh/scp,需要安装 apt-get update && apt-get install -y openssh-client - name: Setup SSH key for HK server env: HK_SERVER_KEY: ${{ secrets.HK_SERVER_KEY }} run: | mkdir -p ~/.ssh echo "$HK_SERVER_KEY" > ~/.ssh/id_ed25519_hk chmod 600 ~/.ssh/id_ed25519_hk ssh-keyscan -p 22 47.240.173.235 >> ~/.ssh/known_hosts - name: Generate timestamp id: timestamp run: echo "TS=$(date -u +%Y%m%d%H%M%S)" >> "$GITHUB_OUTPUT" - name: Package and deploy run: | TS=${{ steps.timestamp.outputs.TS }} HK_HOST="47.240.173.235" # 打包并上传 tar -czf site-${TS}.tar.gz -C blog/public . scp -i ~/.ssh/id_ed25519_hk -P 22 site-${TS}.tar.gz root@${HK_HOST}:/tmp/ # 远程部署 + 自动清理旧版本(保留最近 5 个) ssh -i ~/.ssh/id_ed25519_hk -p 22 root@${HK_HOST} " set -e BASE_DIR='/data/workspace' RELEASES_DIR=\"\$BASE_DIR/releases\" NEW_RELEASE=\"\$RELEASES_DIR/${TS}\" CURRENT_LINK=\"\$BASE_DIR/blogs\" # 创建目录 mkdir -p \"\$RELEASES_DIR\" mkdir -p \"\$NEW_RELEASE\" # 解压到新版本目录 tar -xzf /tmp/site-${TS}.tar.gz -C \"\$NEW_RELEASE\" # 设置权限(确保 Nginx 容器可读) chmod -R 755 \"\$NEW_RELEASE\" # 原子切换软链接 ln -sfn \"\$NEW_RELEASE\" \"\$CURRENT_LINK.new\" mv -T \"\$CURRENT_LINK.new\" \"\$CURRENT_LINK\" # 删除临时压缩包 rm -f /tmp/site-${TS}.tar.gz # === 自动清理:保留最近 5 个 release === cd \"\$RELEASES_DIR\" && \ if [ \$(ls -1t 2>/dev/null | wc -l) -gt 5 ]; then ls -1t | tail -n +6 | xargs -r rm -rf fi # 重启 Nginx 容器(关键!) docker restart nginx echo '✅ Deployed version ${TS}, old releases cleaned (keep last 5).' " - name: Report success run: echo "✅ Deployed version ${{ steps.timestamp.outputs.TS }}!"
执行步骤如下:
触发条件检测 v 开头的 Git 标签(如 v1.0.0)时,自动触发 CI/CD 工作流。启动运行环境 ubuntu-latest 的 Gitea Runner 上执行,并使用 Docker 容器 zjykzj/hexo-env:latest 作为运行环境,该镜像已预装 Node.js、Hexo 等构建工具。克隆代码并检出标签 http://172.23.217.55:3000/zjykzj/HexoNexT.git 克隆仓库,并切换到当前触发的标签(${{ gitea.ref_name }}),确保构建指定版本的代码。验证目录结构(调试) blog/ 子目录内容,确认 Hexo 项目结构完整,便于快速排查路径错误。安装依赖并生成静态站点 blog/ 目录,执行:
npm install --legacy-peer-deps --prefer-offline:绕过 peer dependency 冲突,加速安装;npm run cg:生成静态文件至 blog/public/。
安装 SSH 客户端(若缺失) apt-get install -y openssh-client 安装 scp 和 ssh 命令,为后续远程操作做准备。配置 SSH 认证密钥 HK_SERVER_KEY 私钥,保存为 ~/.ssh/id_ed25519_hk,设置权限为 600,并通过 ssh-keyscan 添加服务器公钥指纹到 known_hosts。生成唯一时间戳 date -u +%Y%m%d%H%M%S 生成部署版本标识(如 20251207132145),并通过 $GITHUB_OUTPUT 供后续步骤引用。打包、上传并远程部署
将 blog/public/ 打包为 site-${TS}.tar.gz;
使用 scp 上传至香港服务器 /tmp/;
通过 ssh 在远程服务器执行:
创建新版本目录 /data/workspace/releases/${TS};
解压文件并设置 chmod -R 755 权限;
原子性更新软链接 /data/workspace/blogs 指向新版本;
删除 /tmp/ 中的临时压缩包;
自动清理旧版本:保留最近 5 个 release,删除更早的;
执行 docker restart nginx 使变更生效(因 Docker volume 不动态跟踪软链接目标变化)。
报告部署成功 ✅ Deployed version 20251207132145!。
在上面CI&CD中,每次运行都需要重新下载node_modules,所以我打算把本地node_modules打tar包上传到Gitea HexoBlog的release上面,然后在Gitea Actions运行过程中使用它
第一步:在本地生成node_modules.tar.gz
1 2 3 4 5 6 7 8 9 10 11 12 13 14 15 16 17 18 19 20 21 22 23 # 进入你的 Hexo 项目根目录(包含 blog/ 子目录) cd /path/to/HexoNexT # 进入 blog 目录 cd blog # 清理旧依赖(可选但推荐) rm -rf node_modules package-lock.json # 安装依赖(关键:使用 --legacy-peer-deps 解决 Hexo v8 插件冲突) npm install --legacy-peer-deps # 验证能成功构建 npm run cg # 返回项目根目录 cd .. # 打包 node_modules(注意:tar 在 blog/ 外层打包,保留路径结构) tar -czf node_modules.tar.gz -C blog node_modules # 检查是否生成 ls -lh node_modules.tar.gz
1 2 3 4 5 6 7 8 9 10 11 12 13 14 15 16 17 18 19 20 21 22 23 24 25 26 27 28 29 30 31 32 33 34 35 36 37 38 39 40 41 42 43 44 45 46 47 48 49 50 51 52 53 54 55 56 57 58 59 60 61 62 63 64 65 66 67 68 69 70 71 72 73 74 75 76 77 78 79 80 81 82 83 84 85 86 87 88 89 90 91 92 93 94 95 96 97 98 99 100 101 102 103 104 105 106 107 name: Upload & Deploy to Hong Kong Server (Docker Nginx) on: push: tags: - 'v*' jobs: upload-and-deploy: runs-on: ubuntu-latest container: zjykzj/hexo-env:latest steps: # === 步骤 1:克隆仓库 === - name: Clone repository and checkout tag run: | git clone http://172.23.217.55:3000/zjykzj/HexoNexT.git . git fetch --tags git checkout ${{ gitea.ref_name }} # === 步骤 2:调试目录结构 === - name: "Debug: List directory structure" run: | pwd ls -la [ -d "blog" ] && ls -la blog/ || echo "❌ blog/ missing" # === 步骤 3:下载预构建的 node_modules === - name: Download prebuilt node_modules from Gitea Release env: GITEA_TOKEN: ${{ secrets.HexoBlog_TOKEN }} run: | cd blog echo "📥 Fetching release info for 'deps-latest'..." # 获取 browser_download_url(使用 Authorization 头) BROWSER_URL=$(curl -s \ -H "Authorization: token $GITEA_TOKEN" \ "http://172.23.217.55:3000/api/v1/repos/zjykzj/HexoNexT/releases/tags/deps-latest" \ | jq -r '.assets[0].browser_download_url') if [ -z "$BROWSER_URL" ] || [ "$BROWSER_URL" = "null" ]; then echo "❌ Failed to get browser_download_url" exit 1 fi # 拼接 token 到 URL(关键!Gitea 要求这样认证下载) DOWNLOAD_URL="${BROWSER_URL}?token=${GITEA_TOKEN}" echo "🔗 Downloading from: $DOWNLOAD_URL" curl -L -o node_modules.tar.gz "$DOWNLOAD_URL" echo "✅ Download completed. Verifying file..." ls -lh node_modules.tar.gz # === 步骤 4:解压 node_modules === - name: Extract node_modules run: | cd blog tar -xzf node_modules.tar.gz echo "✅ node_modules restored." # === 步骤 5:直接构建(无需 npm install!)=== - name: Build Hexo site run: | cd blog npm run cg # 依赖已就位,直接生成! # === 后续步骤:SSH 部署(保持不变)=== - name: Setup SSH key for HK server env: HK_SERVER_KEY: ${{ secrets.HK_SERVER_KEY }} run: | mkdir -p ~/.ssh echo "$HK_SERVER_KEY" > ~/.ssh/id_ed25519_hk chmod 600 ~/.ssh/id_ed25519_hk ssh-keyscan -p 22 47.240.173.235 >> ~/.ssh/known_hosts - name: Generate timestamp id: timestamp run: echo "TS=$(date -u +%Y%m%d%H%M%S)" >> "$GITHUB_OUTPUT" - name: Package and deploy run: | TS=${{ steps.timestamp.outputs.TS }} HK_HOST="47.240.173.235" tar -czf site-${TS}.tar.gz -C blog/public . scp -i ~/.ssh/id_ed25519_hk -P 22 site-${TS}.tar.gz root@${HK_HOST}:/tmp/ ssh -i ~/.ssh/id_ed25519_hk -p 22 root@${HK_HOST} " set -e BASE_DIR='/data/workspace' RELEASES_DIR=\"\$BASE_DIR/releases\" NEW_RELEASE=\"\$RELEASES_DIR/${TS}\" CURRENT_LINK=\"\$BASE_DIR/blogs\" mkdir -p \"\$RELEASES_DIR\" mkdir -p \"\$NEW_RELEASE\" tar -xzf /tmp/site-${TS}.tar.gz -C \"\$NEW_RELEASE\" chmod -R 755 \"\$NEW_RELEASE\" ln -sfn \"\$NEW_RELEASE\" \"\$CURRENT_LINK.new\" mv -T \"\$CURRENT_LINK.new\" \"\$CURRENT_LINK\" rm -f /tmp/site-${TS}.tar.gz cd \"\$RELEASES_DIR\" && ls -1t 2>/dev/null | tail -n +6 | xargs -r rm -rf docker restart nginx " - name: Report success run: echo "✅ Deployed version ${{ steps.timestamp.outputs.TS }} using prebuilt node_modules!"
小结 终于,经过一个多月时间的努力,完成了Hexo/NexT最新版本的迁移。非常感谢这些开源仓库的作者,也希望这两篇文章能够帮助其他人更好的构建博客网站~